|
Converting Revell's 1/48th F-15E to a Boeing F-15I Ra'am |
|
The conversion process is a fairly simple one, it is just a matter of being able to get the necessary items to carry out the conversion. For the conversion use the following items:
|
|
|
|
Converting Revell's 1/48th F-15E to a Boeing F-15I Ra'am |
|
The conversion process is a fairly simple one, it is just a matter of being able to get the necessary items to carry out the conversion. For the conversion use the following items:
|
|
|
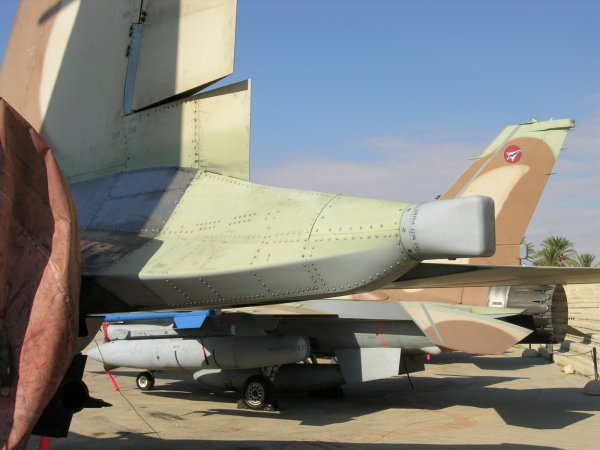
1. Cut the ECM fairing off the top of the port fin (part 8) at the point where it attaches to the fin. Cut a length of the Evergreen rod (the same diameter as the fairing on the starboard fin) to the same length as the counterbalance on the top of the starboard fin. Sand the front to the correct shape and glue to the top of the starboard fin. If you want the fin tips to match exactly, replace the fairing on the starboard fin in the same manner.
|
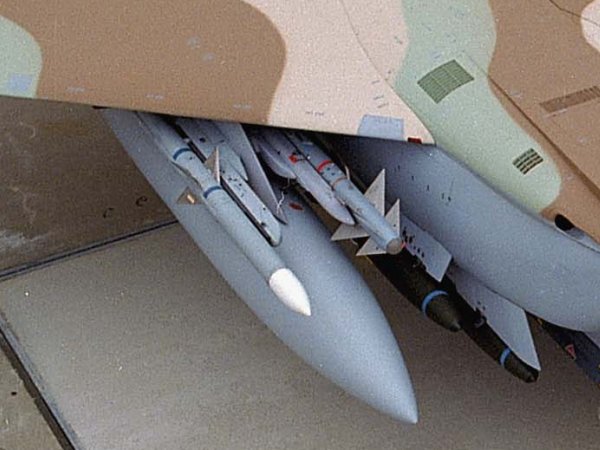
| 2.
If you choose to use the Eagle Designs Pythons and SOL AMRAAMs, cut the outboard Sidewinder rails
from their mounting (2 of part 55) and put all of the
Sidewinder parts (parts 56 and 57) in the spares box. Use cyano or epoxy glue to
attach one of the SOL AMRAAM rails to the outboard of each wing pylon.
Use the kit rails on the inboard of the pylon. When
finished painting the aircraft, attach the assemled SOL AMRAAMs and
Eagle Designs Python IVs to the wing pylons. The Pythons go on the inboard
rails and the AMRAAMs on the outboard. Alternatively just use
the kit rails and Sidewinders.
|
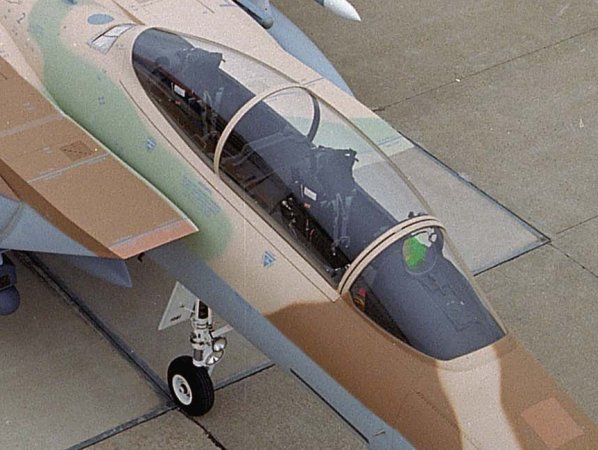
| 3.
Replace the kit cockpit with the Black Box set (although Revell have
done an outstanding job on the cockpit which is usable as is), but use the Revell
control columns (parts 29 and 129) as the Black Box sticks (parts
13) are too short. On the Black Box resin ACES II seats, do not use
the centre ejection handle (part 5) that attaches to the pan
between the pilot's legs. These are not used on the real seats. Also,
though a rear throttle is not shown on the Black Box instruction sheet,
there are two included, and the second quadrant (part 12) should
be attached to the rear port instrument console on the blank panel
(refer to the Revell cockpit for position if you aren't sure).
|
| 4.
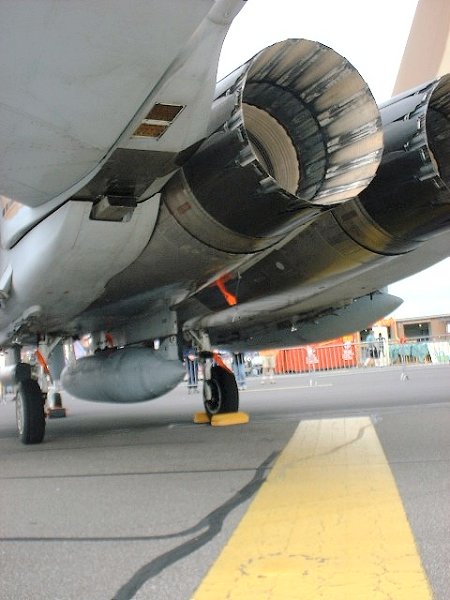
Saw off the stepped rear section
of the kit afterburner cans (parts 16), and discard the nozzle
segments (parts 17) and control rods (parts 18). Glue the
rest of the afterburner can flush with the opening in the fuselage
halves (as per the kit instructions). Later when painting is finished
attach the two afterburner nozzles from the Hasegawa kit or Aires, as the F-15I
nozzles still have the turkey feathers on them.
|
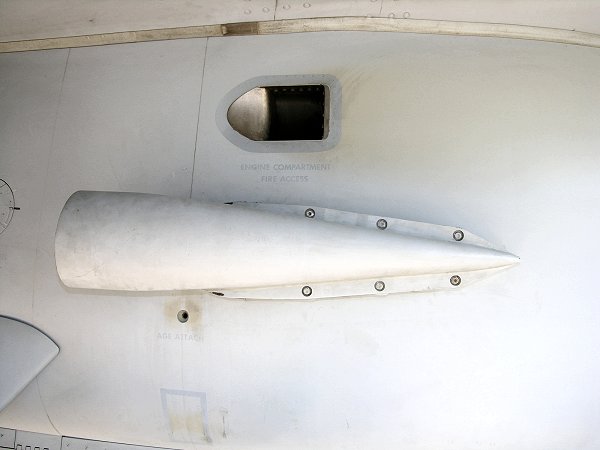
| 5.
Revell includes 4 small intake parts (parts
97, 98, 197 and 198) which are not used on the instructions. These
should be assembled (part 97 to 98 and part 197 to 198) and
attached to the sides of the conformal fuel tanks as per reference
images.
|
| 6.
There is a small black GPS bump
located on the port side of the aircraft. Make this from a small piece
of styrene rod by rounding the end of the rod, cutting this piece off of
the rod and gluing in place.
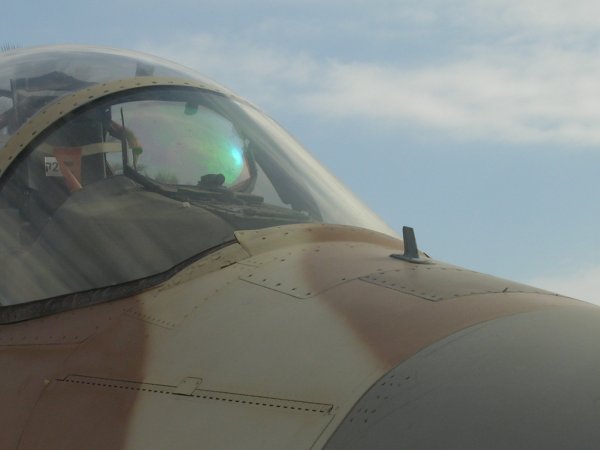
7. Fill the small round grille behind and below the canopy on the starboard side - this is not present on IAF F-15Is. 8. The upper forward weapons pylon on the conformal fuel tanks (both sides of the aircraft) does not have a pointed front end anymore. Cut of the front at right angles to the CFT and sand to restore the aerofoil front end.
|
| 9.
Reshape the small ECM bump on the
port end of the tail boom to resemble the one on the starboard, but
rotated 90°.
|
|
10. Included on the IsraDecal sheet are decals for the chaff/flare dispensers located in front of the wheel wells, and the other pair of dispensers under each of the tail booms. You will need to use the stencils for the LANTIRN pods from the Revell kit.
|
|
These are the necessary steps to perform the conversion. All other assembly is as per instructions. You will need aftermarket weapons as well, as the Sidewinders are the only items included in the kit. |
|
UPDATE 24/04/06 |
|
There are a few new updates come to hand which will be necessary for a current F-15I. |
|
1. Small blade antenna in front of the windscreen - this is located on the fusealge centreline.
|
|
2. MFDs in the front and rear cockpit - both front and rear cockpits have a new MFD. The front cockpit ones is in place of the HUD push button control panel, and the one in the rear cockpit is on the right hand side of the instrument panel, at the front of the side console (no current images). |
|
3. CFT pylon changes for carrying AMRAAM - when the AIM-120 is carried on the pylon, the sway braces need to be moved backwards (no current image) |
|
|


 For
an excellent reference on this aircraft including weapons loads and
cockpit shots, I recommend the IsraDecal publication by Ra'anan Weiss F-15I
Ra'am in IAF service available from
For
an excellent reference on this aircraft including weapons loads and
cockpit shots, I recommend the IsraDecal publication by Ra'anan Weiss F-15I
Ra'am in IAF service available from